How to Paint Flowers
How to paint flowers
Are you struggling with how to paint flowers in watercolor or in oil? Don’t you know how to get depth or how to get a three dimensional look for your flower paintings? No matter if you want to paint realistic or loose flowers – the magic is always there if you are able to create the form and to get depth and to make your flower paintings glowing. I will share how to paint flowers, so read on.
Choose the right colours for your flower paintings
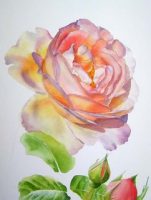 I work mostly in watercolor but also use here and there oil paints. I believe that only with transparent colours we are able to create this special glowing in our flower paintings. With transparent colours we are able to work in layers and to let previous colour layers shine through following colours. That is what makes our watercolors so special. The effect you acchieve when working with layers in watercolor is never possible when working with non-transparent colours.
On my Art Materials page I share which colours are on my watercolor palette for my flower paintings. Be sure that you use transparent colours.
The less colours you use in your paintings the more colour harmony you’ll get.
Use colour temperature – cool and warm colours
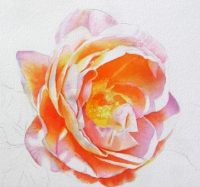 On my watercolor palette are warm and cool colours. Warm and cool is the temperature of our colours and using colour temperature in our paintings help us to create the form and to get depth and to make our work glowing.
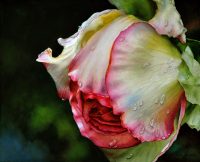
As excample: When painting flowers in natural light, just so as if they are in a garden, then usually we have cool highlights and warm shadows. We have cool highlights because the flower there is affected by the most light and here also affected by the sky. This means we use cool colours for our lightest areas and then warm colours for our shadow areas.
If we painted all our highlights and lightest areas warm then the shadow areas would be cool.
Shadow areas are those areas which aren’t affected by light.
Using colour temperature in our paintings means we can create depth and the three dimensional form.
BUT we can also change the colour temperature of a colour if we mix it with a warmer or cooler colours. This means that you don’t need to paint with maybe two different reds when you want to have a warm and a cool red. Mix a bit of yellow with your red and you will warm it up. Add a bit of blue and you cool it down.
Use lights and darks
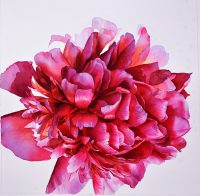 Also important is that we use lights and darks to create the form. Those areas which are affected by light get only light colour washes while those areas in shadow get the richest colour washes. Often when painting a light wash we only supply maybe one layer of colour. If we are working in dark areas it means we have to add several layers of colours until we are happy with the richness of these washes.
Using lights and darks also very important to create the form of our flower.
Make your flower glowing
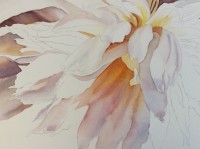 As I mentioned before we are going to paint our shadow areas warm and rich in colour. But we also want to create glowing areas so the first what we can do is painting yellow underwashes. You can start with a yellow underwash using Indian Yellow (Schmincke) or New Gamboge (Winsor & Newton). Maybe it is good to add two or three layers of this yellow. In the photo left – which is a work in progress of a white peony – I also used some Translucent Orange over the yellow underwash to emphasize the glowing area.
The petals there are laying in shadow. Although it is a white flower my shadow colour won’t be only blue. Many artists use often only blue as the shadow colours for their white subjects, but I think it can be done much better when using more colours on our white subjects. Here in my paintings my shadow colour is a mix of some red and blue with a touch of yellow. But the first steps were the underwashes of yellow and orange. Here it shows how important it is to use transparent colours so that the previous layers do shine through the next layers. This helps us to create glowing watercolors. I am sure you will agree that this area is really glowing with colour.
Be aware of the highlights
Highlights on our subjects are very important. Always make sure that you save your highlights. Paint around them or use masking fluid to save them. In my article about working with highlights – how to save them or how to get them back you will get more information.
Step-by-Step Photos of How to Paint Daffodils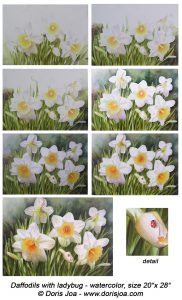
Want to learn more about painting Daffodils in watercolor? Just click on the image and view some step-by-step photos and get some more insights in my painting process.
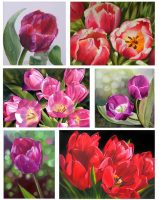
Paint Tulips
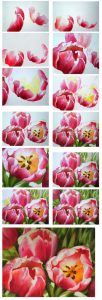 In my article about Painting Tulips I share some steps about painting Tulips. Just click on the image above. I also share some thoughts about finding the right composition.
Paint Hydrangeas
Paint Pink Hydrangeas
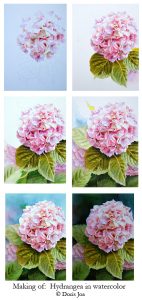 In my Hydrangea Painting the Permanent Rose was my local pink colour. For the cool areas where the tiny petals are affected by light and sky I mixed this pink colour with some cobalt blue. At the base of the petals (where they meet other petals) I started with a yellow underwash, because I wanted to have this area warm. I then mixed my pink with some red. I am using Anthraquinoid Red from DS. So the mix of my Pink and the Red works perfect to create a warm area.
Make a difference between light areas and highlights
My highlights are the white of the paper and other light areas got only a tiny touch of cobalt blue. Not all of our light areas are the same light and not all areas are highlights. This all helps you to create the form. Always remember to create harmony in your painting. Your pinks will need some green, too, if you surround your flower with green leaves. It is the same with the leaves, because they then need also some of your pinks. The colour of the leaves reflect on the flower and the colours of the flower reflect on the leaves. In the photo it is easily to see how working with cool and warm pinks help to create the realistic three dimensional form of my flower painting. Be always aware about the colour temperate (cool against warm colours) and also light against dark as this is the key to create stunning realistic watercolor paintings.
TIP:
When painting flowers and roses you always need to be aware about the local colour and then you need to create the warm and cool areas with adding cooler or warmer colours to your local colour.
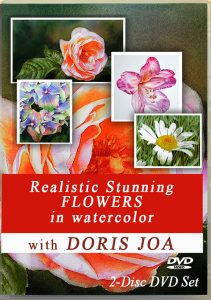
In the Video below is a short preview about my lesson about ‘How to paint hydrangeas’. This shows how I paint the small petals of a blue hydrangea and it is a part from my DVD/Video Lesson ‘Paint Stunning Flowers’.
Happy Painting

Leave a Reply
Want to join the discussion?Feel free to contribute!